By Christian Becksvoort #257–Nov/Dec 2016 Issue
Synopsis: Chris Becksvoort’s not a sit-down type of guy, so it was inevitable he’d design himself a standing desk. This one has a slanted surface for drawing, a flat surface for a laptop, books, coffee mug, and other materials, a foot rail for comfort, and storage inside for office materials. The base is simple mortise-and-tenon construction and the desk box is dovetailed, with an interior gallery and drawer.
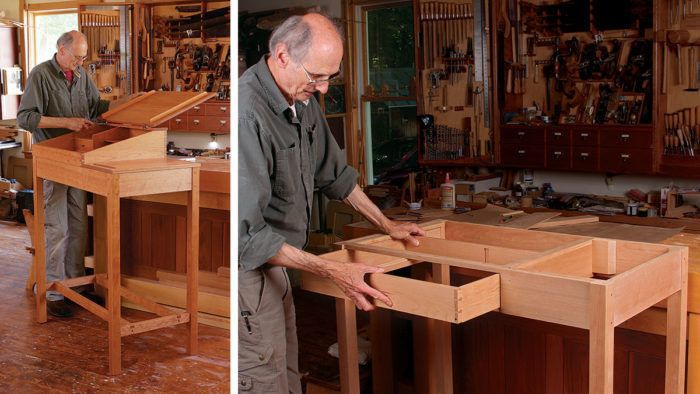
The office corner of my shop wasn’t really an office. It had the file cabinet, the phone, a sound system, and a stool, but what it really needed was a desk. I’m not a sit-down kind of guy, and I’ve had my share of back issues. So I started exploring stand-up desks, since I’ve heard they can do wonders for your posture and productivity. Most of the ones made today have a flat surface of the appropriate height, but lacked what I consider essential, a foot rail. Also, I wanted a slanted surface to draw on, much like an architect’s drawing board, or a sloped desk box or schoolmaster’s desk.
I also had several other requirements. It had to be built to my height, so you may need to tweak the dimensions to suit your own height. Next, it required the aforementioned foot rail to improve comfort and posture. In addition to the slanted surface for drawing, I wanted a flat area for a coffee mug, books, or laptop, as well as a few drawers for paper, pencils, invoices, and the usual office accoutrements. With a few sketches, I settled on a design that looks and functions very well. But I’ve since built a few (all in cherry) with slightly different layouts, drawers, and dimensions. When I decide I want to have a seat at this desk, I just pull up my stool (“Sturdy Stool for Home or Shop,” FWW #245).
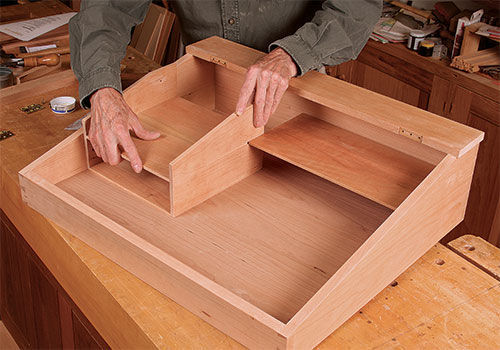
I built the base first using mostly mortise-and-tenon joinery, and added the drawer. With that done, I started the desk box with the slanted lid. First I milled the front, back, and angled sides. Next I dovetailed the corners. Then I cut grooves for the bottom, and one stopped groove on the right side for the interior shelf. Once the box was glued and sanded, I attached the flat top, and then I glued up the lid. When the glue was dry, I cut the lid to size, sanded it, and added two cleats below to keep it flat. A small lip on the front edge keeps papers from sliding off.
Download the plans for this table from the Digital Plans Library. Plus, browse 100+ other plans available for members only.
For the full article, download the PDF below:
Sign up for eletters today and get the latest techniques and how-to from Fine Woodworking, plus special offers.